Week 8 - Output Devices
The assignment this week was to add an output device to a microcontroller board that I've designed. Per discussion with Rob Hart, I chose LEDs as output devices. This will be more complicated than the PCB I designed in Week 4 since I will have 2 LEDs and I will have multiple buttons externally attached to the PCB.
Designing PCB
First, I edited my week 4's PCB schematic by getting rid of the crystal oscillator (as there is already one inherent in Attiny) and adding 1 more LED and 4 buttons. I began to design the board before I realized that the buttons should not be directly attached to the board, and thus should not be on the schematic. I want to insert buttons into different objects for my final project. So, I deleted all the buttons off the schematic and simply made the routes that I would attach wires to a bit thicker than other routes. Kevin, a fellow HTMAA-er gave me the idea to extend out the routes where I would attach the wires to make soldering easier. Yay for classmates!

Kevin also gave me the idea to make mini boards for all my buttons so that it would be easier to solder the wires onto the 2 button pins. I milled 4 of these boards so that I could make 2 buttons light up one LED and 2 buttons light up another LED. Because I was milling 5 boards, it took a substantial amount of time to mill all of them, but milling has become straightforward now.

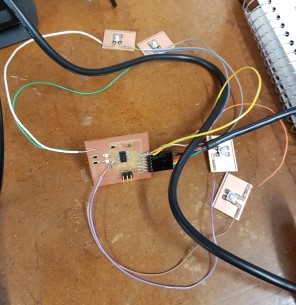
Soldering
The most difficult part about soldering this week was soldering the wires. The wires seemed to almost absorb the solder and it was hard to hold the wire still. A tip that Yuval gave was to create a large rectangle next time at the ends to give myself more room to solder on the wires. Luckily, because I wanted 2 buttons to light up one LED, I could connect the wires to the two buttons together and save myself a bit of soldering as well.
Programming
I had more buttons and LEDs this time, so I had to define more varaibles. The part that got confusing was that my buttons were attached to both PA and PB pins, and thus some of my buttons were on the same series of pins as the LEDs. Because I'm new to programming, I had to slowly edit the files and get troubleshooting help from Julia and Rob. After the c file was edited though, I had to simply input the same commands into terminal as I did for week 6. And voila!
Here is the final C file.
Thanks to Yuval, Rob, and Julia for your help!